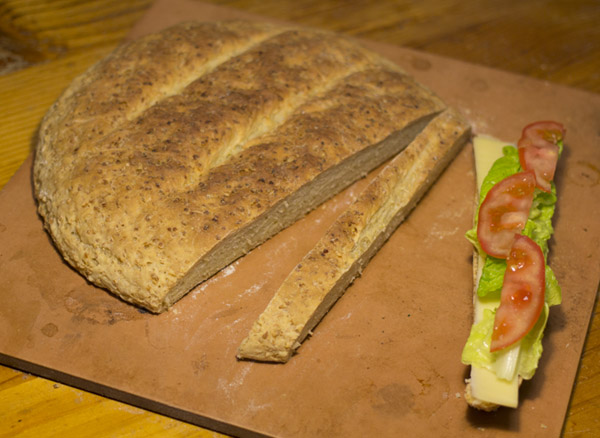
out of the frying pan: quinoa bread
 I used to be irrationally afraid of baking with yeast.
Baker’s yeast is the leavening agent used in baking that causes bread to rise and adds air to your dough, making it all wonderful and fluffy. Without it you’d basically end up with a dry, inedible lump of hot flour. It’s also a microorganism, and something in that knowledge always worried me. Perhaps it was the thought that the unpredictable little yeast would fail to make my dough rise and lead to all sorts of bread related inadequacies on my part if my loaf didn’t come out looking like a delicious French baguette in a window display.
It’s a few months since I started baking bread regularly and I’m yet to produce a loaf (or tasty elliptical blob) that hasn’t been better, cheaper and healthier (less preservatives, E numbers and chemical rising agents, yay) than your average supermarket bread. That’s not to say that I’m a particularly adept baker, it’s just that my yeast related fears were unfounded. All you need is a warm place, patience, and a few hours to allow it to rise adequately.
Recently I decided to branch out from my regular white bread recipe and give quinoa bread a go. It turned out magnificently. The quinoa melts into the bread and leaves it with a lovely texture and a crispy crust. Perfect for sandwiches, served with soup, or spread with peanut butter and honey. Quinoa is also packed with protein, iron and calcium, and is a vegan wonder-food.
Quinoa Bread
Many bread recipes I’ve encountered utilise milk, eggs and half a dozen other ingredients that are more or less unnecessary. I like to stick to the bare bones. The bread is no worse for it, and the yeast is probably happier without all the potentially inhibiting ingredients. Happy yeast is good yeast.
Ingredients
400g plain white flour
½ cup quinoa
7g baker’s yeast (the yeast I buy comes in 7g sachets, but anything from 7-10g is fine)
1 ½ cups warm water
pinch of salt
Method
1. Precook quinoa in a saucepan with a cup of water and simmer until it’s soaked up all the liquid and softened. When it’s cooked the texture should still be somewhat hard, but not grainy. It basically pops pleasantly when you bite into it.
2. Sieve flour into a large mixing bowl. Add yeast, and water (you may not need all the water, so start with one cup and add more as you need) and mix roughly before adding salt. Try to just mix with one hand so you have the other clean for bowl holding and emergency nose scratching, but get in there and mix the whole lot about, picking up all the flour from the sides and bottom of the bowl with the dough.
3. One you’ve got a vaguely cohesive ball, add quinoa and work it into the dough. Dough should be quite soft, but not sticky. It doesn’t matter if it still looks like a bit of a ragged mess. It’ll come together.
4. Flour board or bench space and turn your dough out onto it. It’s important to knead your dough for a while in order to develop the gluten (this will also help the dough rise). The best method is to hold the dough in place with one hand and use the heel of your other to stretch it out, and fold it back in on itself. Don’t be afraid to keep flouring your board if the dough begins to stick. Repeat process until your dough springs back lightly when you poke it with a finger.
5. Work dough into a ball and place in a bowl. If you’re worried about it sticking you can lightly oil the bowl. Cover with a damp tea towel and leave in a warm place until the dough has doubled in size. This may take 40-60 minutes.
6. Turn your dough out onto a floured board and knock all of the air out of it by kneading it briefly. If you’d like a more traditional shaped loaf, at this point you can place the dough in a baking tin, but I usually just fold and shape it into a ball. I then place it on the tray I plan to bake it on. Make sure it’s floured (semolina is even better as it doesn’t burn in the oven). Cover dough with a damp tea towel and leave it to rise again until it’s doubled in size.
7. Preheat your oven to 220-230°C (200-210°C fan forced). Score a few shallow cuts across the top of your dough with a knife. Pop it in the oven for 35-45 minutes. Once it’s cooked it should sound hollow when you tap it. If you’re still unsure, stick a skewer in it, and if it comes out clean it’s ready.
8. The most important step. Get a knife, cut a slice, and eat it hot from the oven. When everyone goes on about life’s elusive simple pleasures, they’re at least in part referring to the experience of eating fresh, homemade bread.


I made a variation of this on the weekend (with wholemeal flour and sourdough starter) and it worked brilliantly. Great recipe, thanks!